RESTful Web Services – HTTP Basic Authentication
In this RESTful web services blog, we will learn about how to enable the HTTP basic authentication for your web application. HTTP basic authentication is the first step in learning security and securing your web services from outside world.
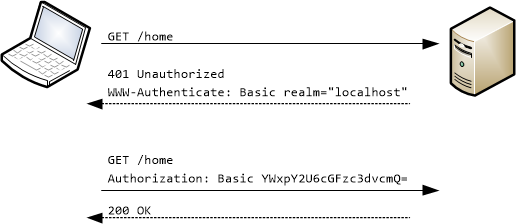
As the consumer of the Restful web services will be invoking any API it’s better we validate the credentials in a centrailsed place instead of in all controllers. I will be using a standard servlet filter to intercept the request, validate the basic authentication and continue with response otherwise throw http status code 401 Unauthorised.
Steps for adding HTTP Basic Authentication
Add a Filter
Before the RESTful resource is invoked, we get control in to the RestAuthenticationFilter class. We get the HTTP Header value for Authorization. That’s the Basic authentication credential and we will pass it on to AuthService for validation.
public class RestAuthenticationFilter implements Filter {

  public static final String AUTHENTICATION_HEADER = "Authorization";

  public void doFilter(ServletRequest request, ServletResponse response, FilterChain chain)
      throws IOException, ServletException {
    if (request instanceof HttpServletRequest) {
      final HttpServletRequest httpServletRequest = (HttpServletRequest) request;
      final String authCredentials = httpServletRequest.getHeader(AUTHENTICATION_HEADER);

      final AuthService authService = new AuthService();
      final boolean authenticationStatus = authService.authenticate(authCredentials);

      if (authenticationStatus) {
        chain.doFilter(request, response);
      } else {
        if (response instanceof HttpServletResponse) {
          HttpServletResponse httpServletResponse = (HttpServletResponse) response;
          httpServletResponse.setStatus(HttpServletResponse.SC_UNAUTHORIZED);
        }
      }
    }
  }

  public void init(FilterConfig filterConfig) throws ServletException {
    // No Implementation
  }

  public void destroy() {
    // No Implementation
  }

}
Add Filter Mapping
   <filter>
      <filter-name>AuthenticationFilter</filter-name>
      <filter-class>com.bhargav.auth.filter.RestAuthenticationFilter</filter-class>
   </filter>
   <filter-mapping>
      <filter-name>AuthenticationFilter</filter-name>
      <url-pattern>/api/*</url-pattern>
   </filter-mapping>
Add a Service
Here we have standard Java code. We extract the username and password from the authCredentials string. Then verify it against the existing credentials and return boolean accordingly.
public class AuthService {

  private static final Logger LOGGER = LoggerFactory.getLogger(AuthService.class);

  public boolean authenticate(final String authCredentials) {

    if (null == authCredentials) {
      return false;
    }

    // Header value format for Basic authentication will be "Basic encodedstring"
    final String encodedUserAuthCredentials = authCredentials.replaceFirst("Basic ", "");
    String decodedUserAuthCredentials = null;
    try {
      byte[] decodedBytes = Base64.getDecoder().decode(encodedUserAuthCredentials);
      decodedUserAuthCredentials = new String(decodedBytes, "UTF-8");
    } catch (IOException e) {
      LOGGER.error("errorMessage: {}", e.getMessage(), e);
    }

    final StringTokenizer tokenizer = new StringTokenizer(decodedUserAuthCredentials, ":");
    final String userName = tokenizer.nextToken();
    final String userPassword = tokenizer.nextToken();

    return "admin".equals(userName) && "admin".equals(userPassword);
  }

}
After all above steps, compile your project and build the artifact. Once the artifact is built successfully, deploy it in your application/web server container like tomcat, jboss etc.
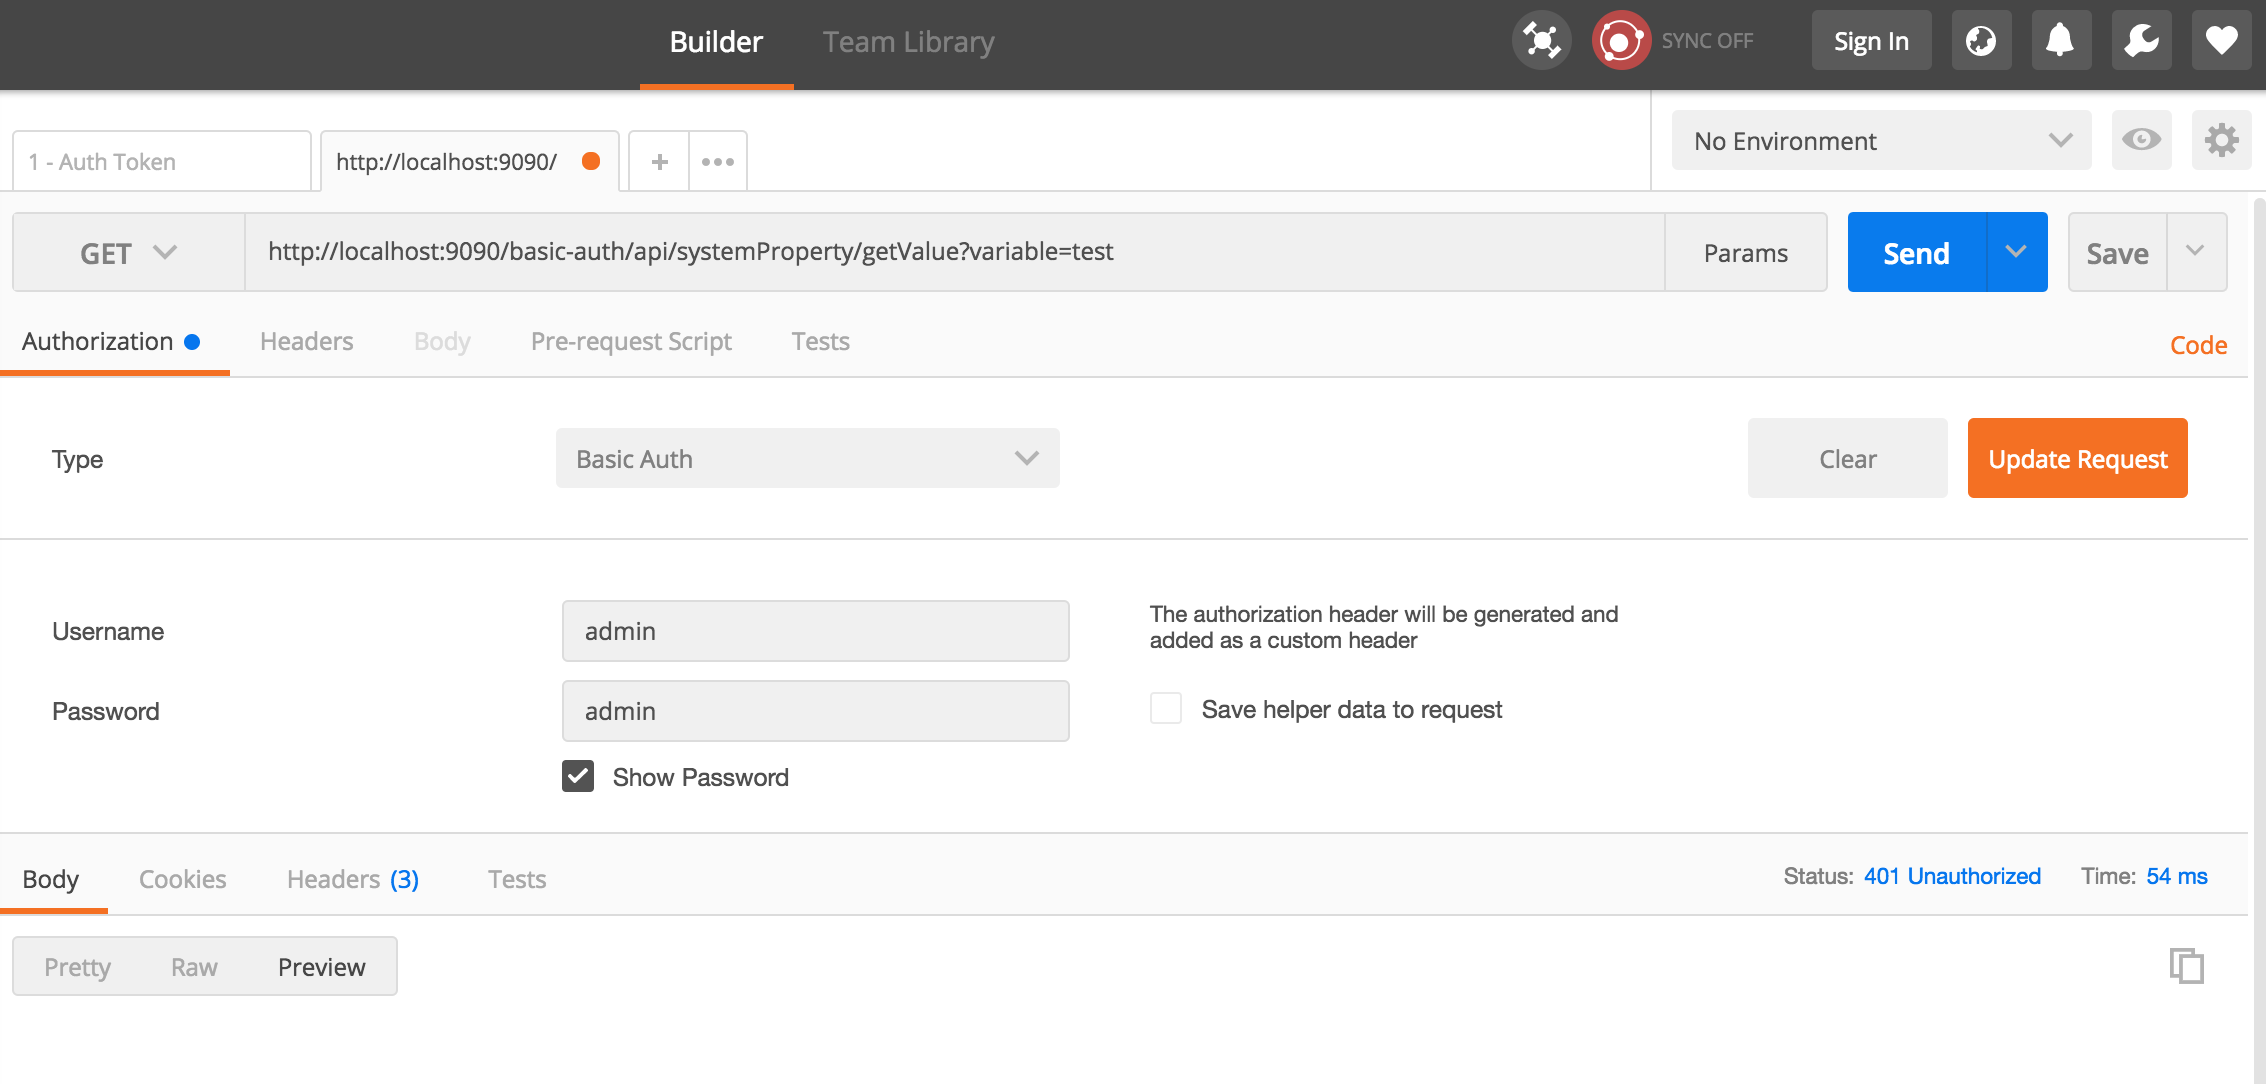
Use any of the Rest Client like postman, advanced rest client to test the RESTful web services. Type in the following url:
http://localhost:9090/basic-auth/api/systemProperty/getValue?variable=test

You should see that web service throws 401 Unauthorised as response. It means the web service is secured with Basic Authentication and the filter is working as expected.
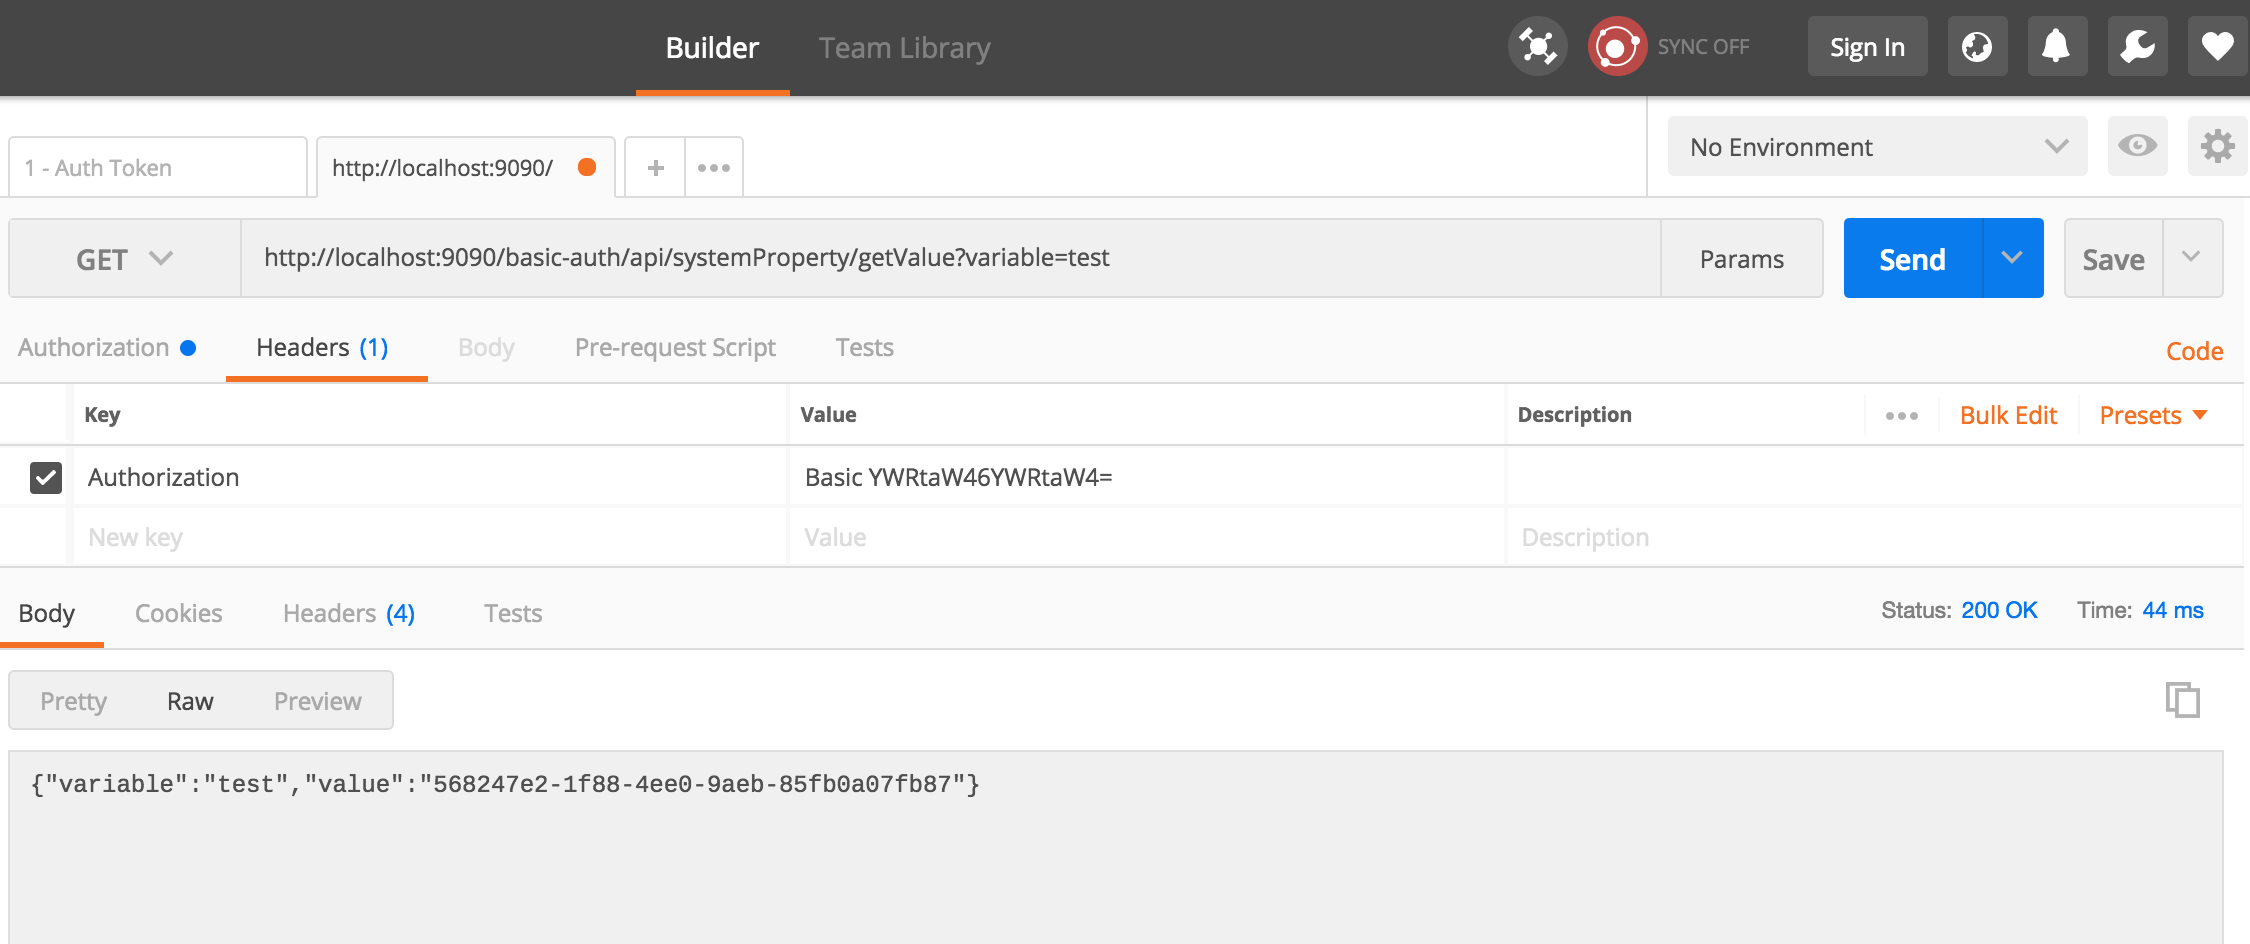
Now let’s send the basic auth credentials in this REST client. Go to the Headers tab and type the header as Authorization in the key field and then go to the value field. On focus of value, we get a small pop-up or button and on clicking that we get the form to enter username and password. Please key in the username as admin and password also as admin. Click on OK button. Now you should see that the username and password is encoded and set as header parameter.
Now validate your API by clicking on Send button, it should provide the response as expected with 200 as status code.
Here is the sample code base of spring REST web service application that has been built as an example for HTTP Basic Authentication. You can download the code from github.